Got a yard of cute fabric just begging to be used? Let’s turn it into something practical, stylish, and totally reversible!
Table of Contents
🧵 Key Takeaways:
- Free, beginner-friendly pattern for a reversible tote bag
- Uses two types of fabric and basic sewing tools
- No tricky closures — just straps and smooth curves
- Tips for turning the bag right-side out (even when it feels impossible!)
- Includes strap-sewing reminders to avoid common beginner mistakes
Imagine This…
You’re standing in your sewing room, surrounded by leftover fabric from past projects. Some floral cotton here, a pop of denim there. You wonder, “What can I make that’s useful, fun, and doesn’t require me to wrestle with zippers?”
Enter the Reversible Bag — a delightful DIY that’s equal parts practical and stylish. And the best part? It’s easier than it looks (trust me, I’ve made a few). Whether you’re a sewing newbie or a seasoned stitcher, this free pattern by Novita Estiti is the perfect weekend project.
📐 What You’ll Need:
- Two different fabrics (refer to them as Set A and Set B)
- Sewing machine with reverse stitch
- Scissors, pins (or fusible tape), and an iron
- Optional: Pockets for a personal touch
Bag Dimensions (Approximate):
- Height: 28 cm / 11 inches
- Width: 40 cm / 16 inches
- Total length (from top of straps to bottom): 50 cm / 20 inches
✂️ How to Make a Reversible Bag
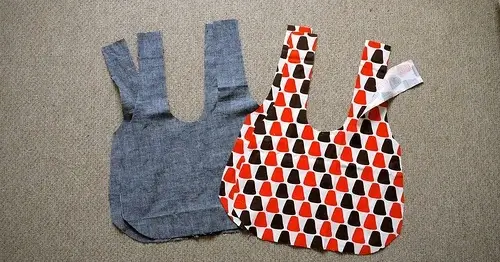
1. Cut Your Fabric
Place the pattern on the fold of your fabric and cut 2 pieces from each fabric — one for Set A and one for Set B.
Tip: If you’re adding pockets, now’s the time to sew them onto the fabric before anything gets assembled.
2. Sew the Darts
Each fabric piece will have darts near the base. Stitch them as instructed on the pattern. These darts give the bag its shape and depth.
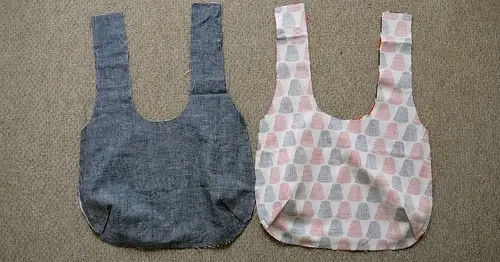
3. Assemble the Outer and Inner Bags
With right sides together, sew the bottom edges of both Set A and Set B. Leave the straps open — we’ll come back to them later.
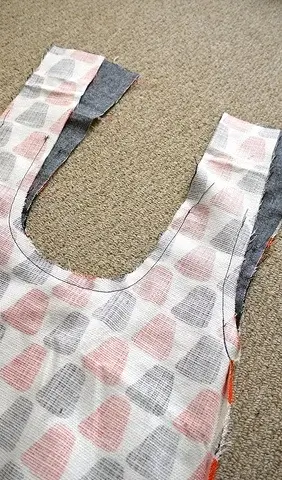
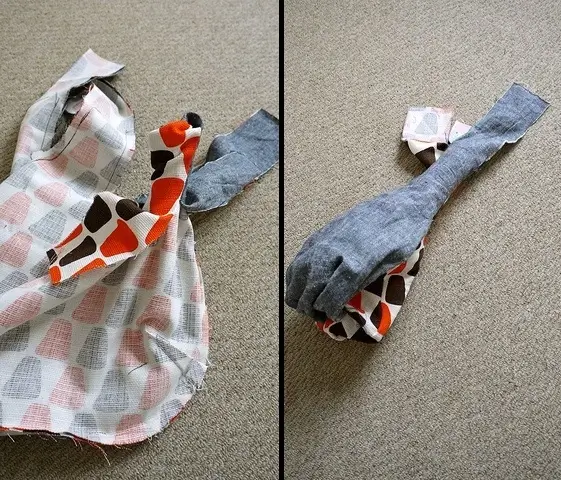
4. Combine the Two Sets
Place Set B inside Set A (right sides facing) and carefully sew around the straps. Stop about 20 cm before the tops of the straps. Use your machine’s reverse stitch to secure both ends of the seam.
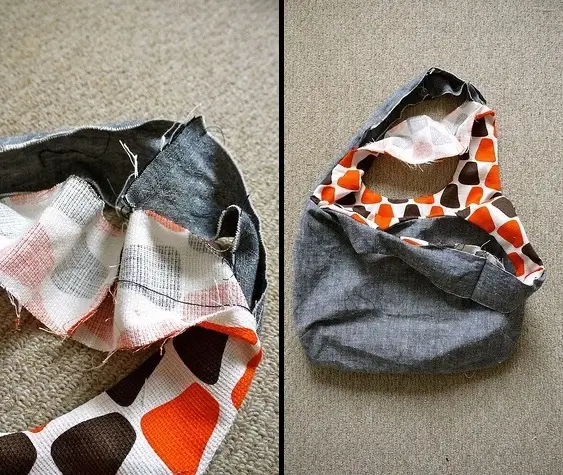
5. Time to Turn it Out
This part might feel a little like wrestling a jellyfish — but keep going! Turn the bag right-side out through one of the straps. It’ll feel snug at first, but once you feel that initial tug, the rest will glide out smoothly.
Personal note: The first time I did this, I was 99% sure I messed something up. Don’t panic — just keep gently pulling and you’ll get there!
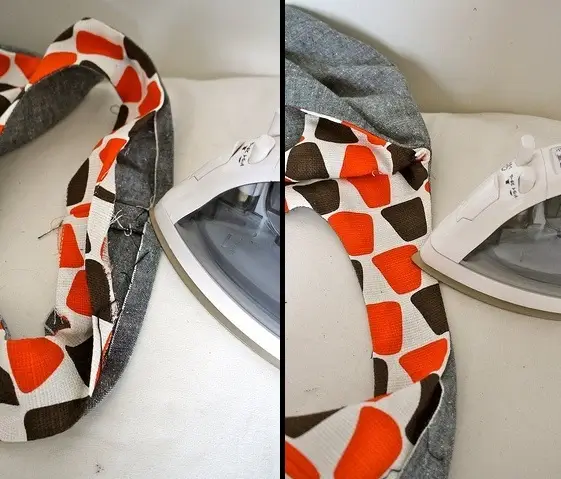
6. Finish the Straps
Pull the remaining straps out and press all the seams with an iron. Fold the strap seam allowances inward and press again. Match the top seams and pin the open strap edges together.
Use pins or fusible tape to keep things neat.
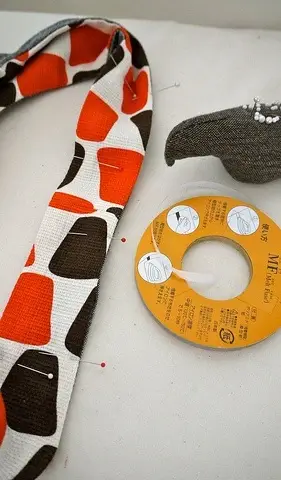
Then sew each strap closed — but make sure you attach the correct ends! Each strap should be sewn to the one beside it, not across from it.
7. Topstitch and Finish
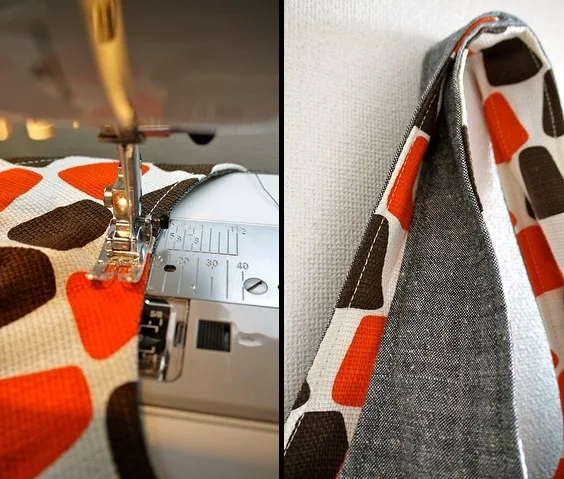
Give your bag that professional touch by topstitching around the top edges. Feel free to use a contrasting thread in the bobbin for a fun detail.
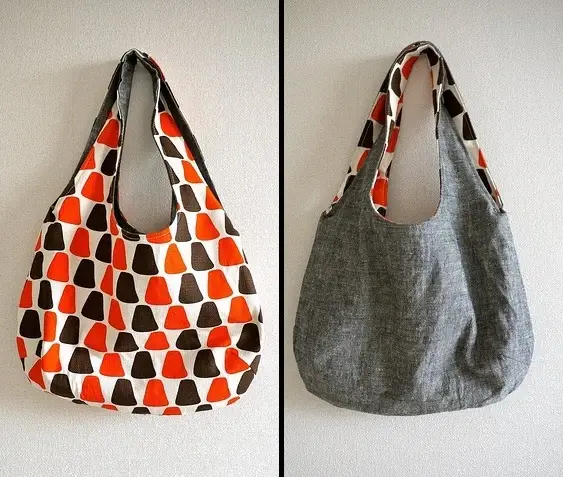
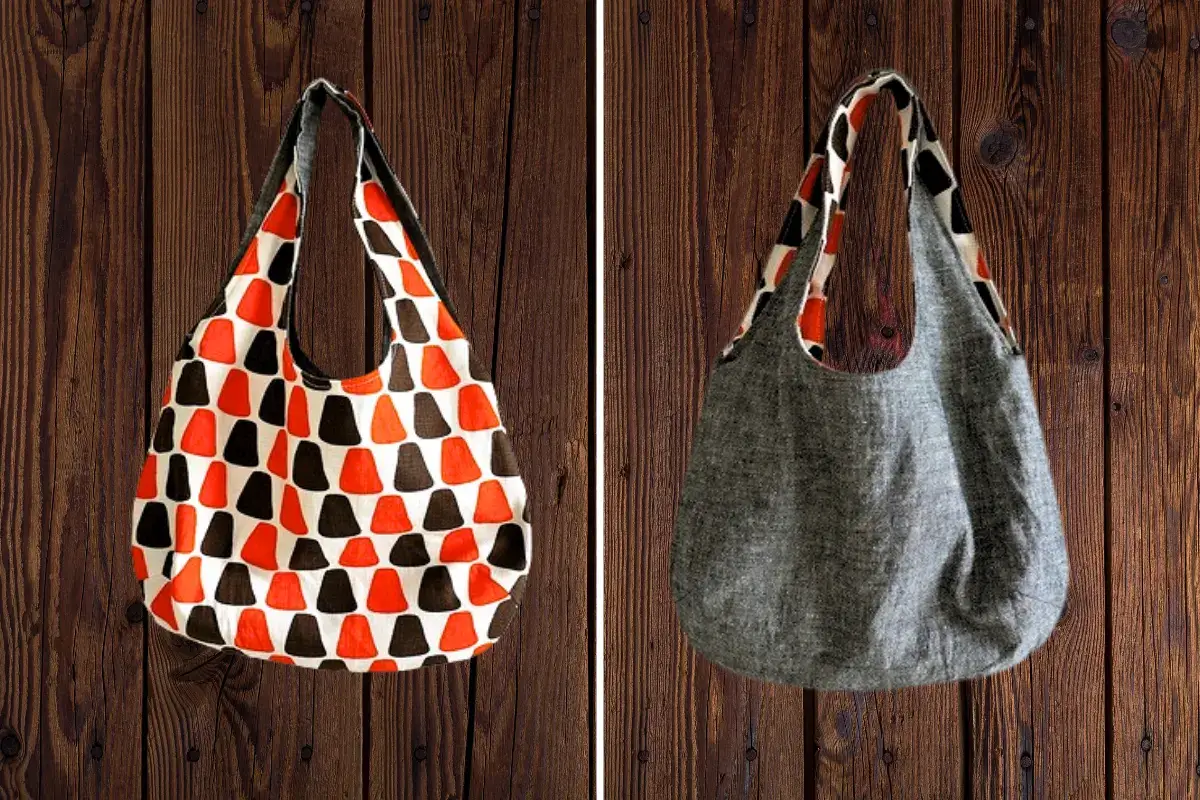
🎉 Look What You Made!
There you have it — a stunning, sturdy, and fully reversible bag! Perfect for groceries, beach days, library runs, or gifting to your handmade-loving friends.
Feel free to sell what you make — just be sure to credit the original designer and don’t pass off the pattern as your own.
Final Thoughts + Let’s Chat!
There’s something so satisfying about a project that’s simple enough for a beginner but stylish enough to use every day. I love how this reversible bag lets you play with fabric combinations — florals on one side, solids on the other? Yes, please!
What fabric combo would you use for your reversible bag? Drop a comment and let’s get inspired together!
And if you loved this tutorial, consider subscribing or checking out more free bag patterns here.

