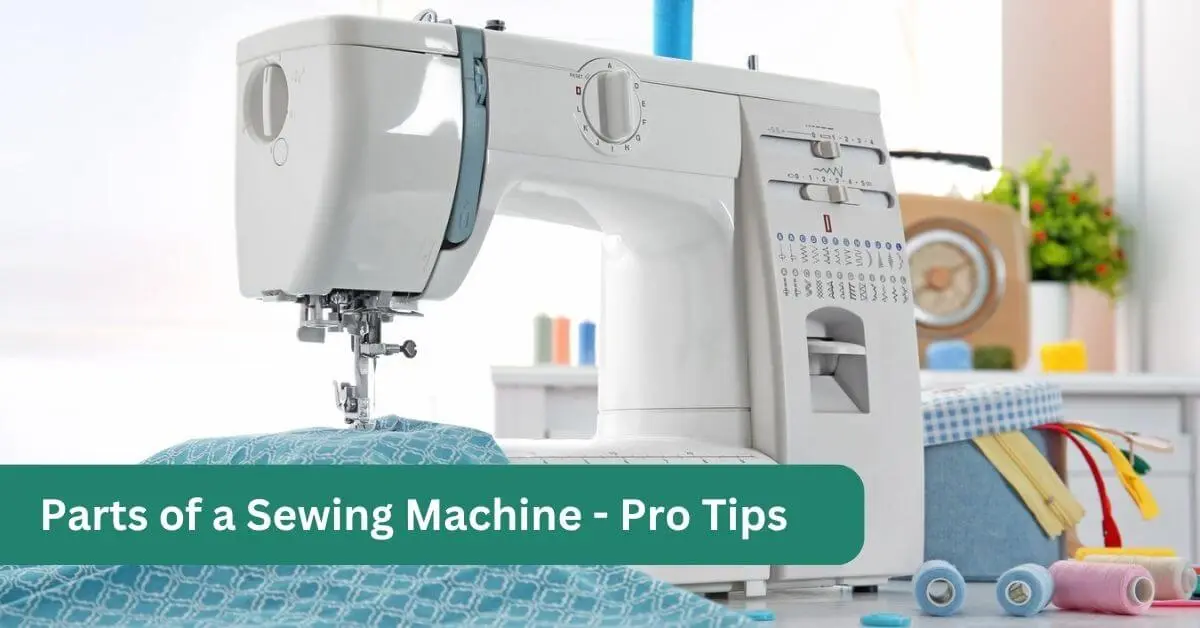
Understanding the parts to a sewing machine helps you operate your equipment more effectively, troubleshoot problems, and maintain your investment for years of reliable service.
Whether you’re threading your first needle or upgrading to an advanced model, knowing your sewing machine anatomy makes the difference between frustrating struggles and smooth stitching sessions. From the needle that pierces fabric to the feed dogs that guide material through, each component plays a crucial role in transforming thread and fabric into finished projects.
Table of Contents
Sewing Machine Anatomy: An Overview
Sewing machines, though varied by brand and type, share a common structure. Whether mechanical, computerized, or serger, every model contains essential components that work together to form stitches and feed fabric.
Key Concept:
Sewing machine anatomy refers to the layout and interconnection of the mechanical and functional parts of the machine. Understanding these parts is crucial for operating, maintaining, and troubleshooting your machine successfully.
Let’s now break down 25+ parts to a sewing machine—explaining what each part does and why it matters to your sewing success.
Sewing Machine Parts Diagram (PDF)
Visual learners, rejoice! Here’s a simplified sewing machine parts diagram
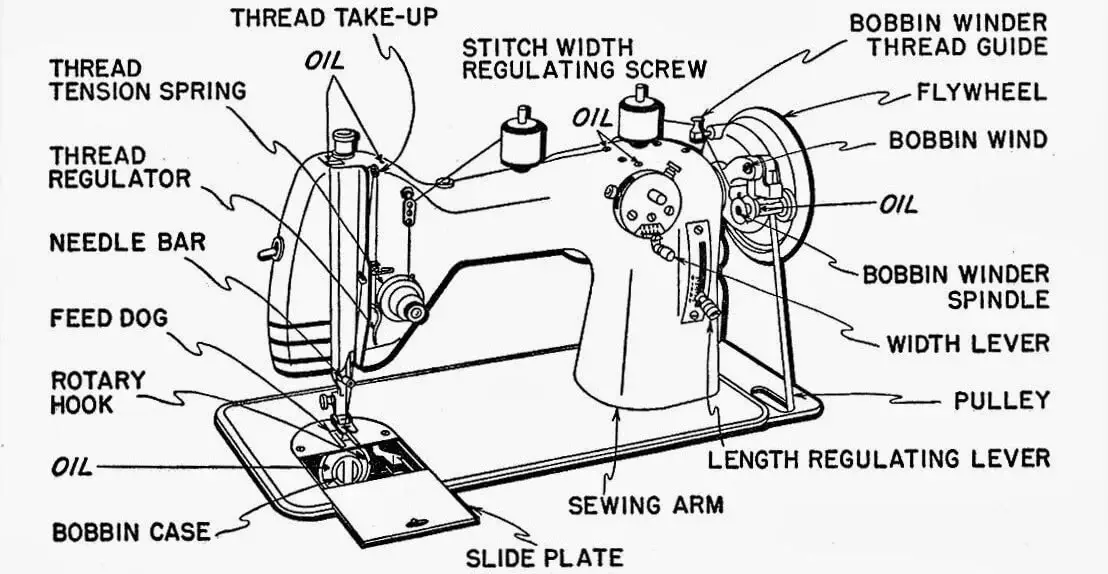
Use this as a cheat sheet when identifying parts on your own sewing machine.
25 Essential parts to a sewing machine and Their Functions
1. Needle
The needle is where the magic begins! It creates the stitch by carrying the upper thread through the fabric.
- Function: Pierces the fabric with thread to form stitches with the bobbin thread.
- Tip: Use the right needle for every fabric type—denim, knit, leather, etc.
2. Presser Foot
This holds the fabric flat while it’s being stitched.
- Function: Keeps fabric stable against the feed dogs to ensure even stitching.
- Variations: Zipper foot, walking foot, buttonhole foot, etc.
3. Feed Dogs
These small metal teeth sit beneath the presser foot and move fabric during sewing.
- Function: Feed fabric forward or backward as the machine stitches.
- Adjustable: Lower for free-motion quilting or embroidery.
4. Throat Plate (Needle Plate)
The flat, metal surface under the needle and presser foot.
- Function: Has guidelines to help stitch straight; protects inner machinery.
- Quick Tip: Clean under here frequently—lint loves hiding!
5. Bobbin
A tiny spool that holds the lower thread inside the machine.
- Function: Works with the needle thread to create a lockstitch.
- Loading System: Drop-in or front-load, depending on your machine model.
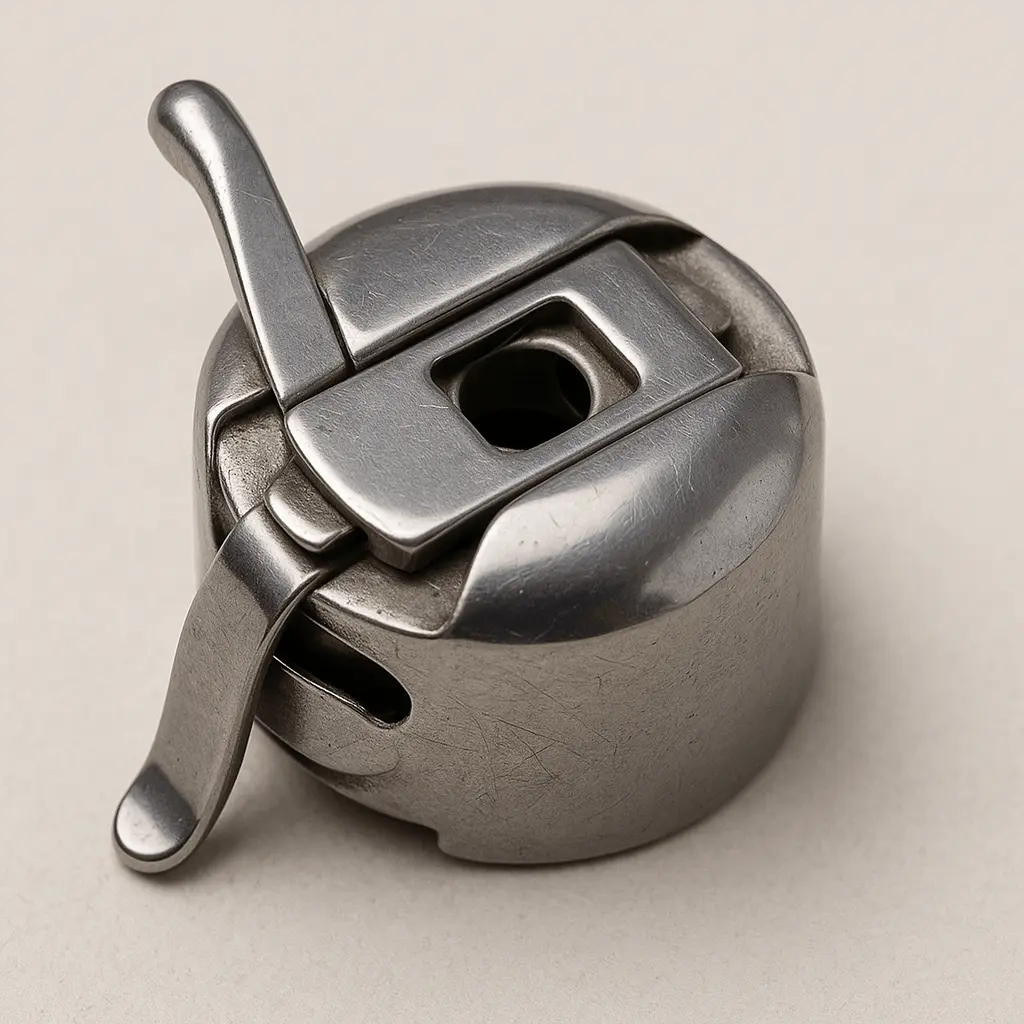
6. Bobbin Case
Holds the bobbin and regulates the lower thread tension.
- Function: Stabilizes the bobbin and ensures consistent stitch formation.
- Important: Use the correct bobbin type for your machine.
7. Spool Pin
Holds your main thread spool in place (horizontally or vertically).
- Function: Ensures a smooth thread path to the tension discs.
- Alternative: Some machines have dual spool pins for twin-needle stitching.
8. Thread Guides
Small hooks and loops that direct thread from the spool to the needle.
- Function: Maintain smooth and tension-controlled threading.
- Tip: Improper threading is a top cause of tension issues.
9. Thread Tension Dial
Controls how tightly the upper thread is pulled.
- Function: Balances tension between the upper and lower threads.
- Indicators: Loose stitches or puckering fabric? Check tension settings.
10. Take-Up Lever
Moves up and down to help feed the thread evenly during stitching.
- Function: Pulls thread from the spool and feeds it to the needle as it moves.
- Location: Often visible through the front slot above the needle area.
11. Stitch Selector Dial / Panel
Let you choose different types of stitches (straight, zigzag, stretch, decorative).
- Function: Allows creative and functional variations in stitching.
- Modern Machines: May use digital LCDs instead of a physical dial.
12. Handwheel
Rotates manually to raise/lower the needle.
- Function: Offers precise control, especially for pivoting and threading.
- Rule of Thumb: Always turn it toward you—never backward.
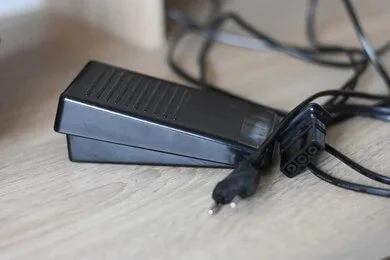
13. Foot Pedal (Speed Controller)
The gas pedal of the sewing world!
- Function: Controls stitch speed—press light for slow, firm for fast.
- Practice Tip: Use your heel for quick stops.
14. Reverse Lever / Button
Used to sew in reverse to lock stitches.
- Function: Secures seams at the beginning and end of straight stitching.
- Shortcut: Use it for quick tacking.
15. Stitch Length Dial
Adjusts how close each stitch is to the next.
- Function: Longer for basting, shorter for securing seams.
- Setting Range: Typically 0–5 mm.
16. Stitch Width Dial
Controls the width of zigzag or decorative stitches.
- Function: Adjusts the side-to-side motion of the needle.
- Use Cases: Appliqué, buttonholes, decorative work.
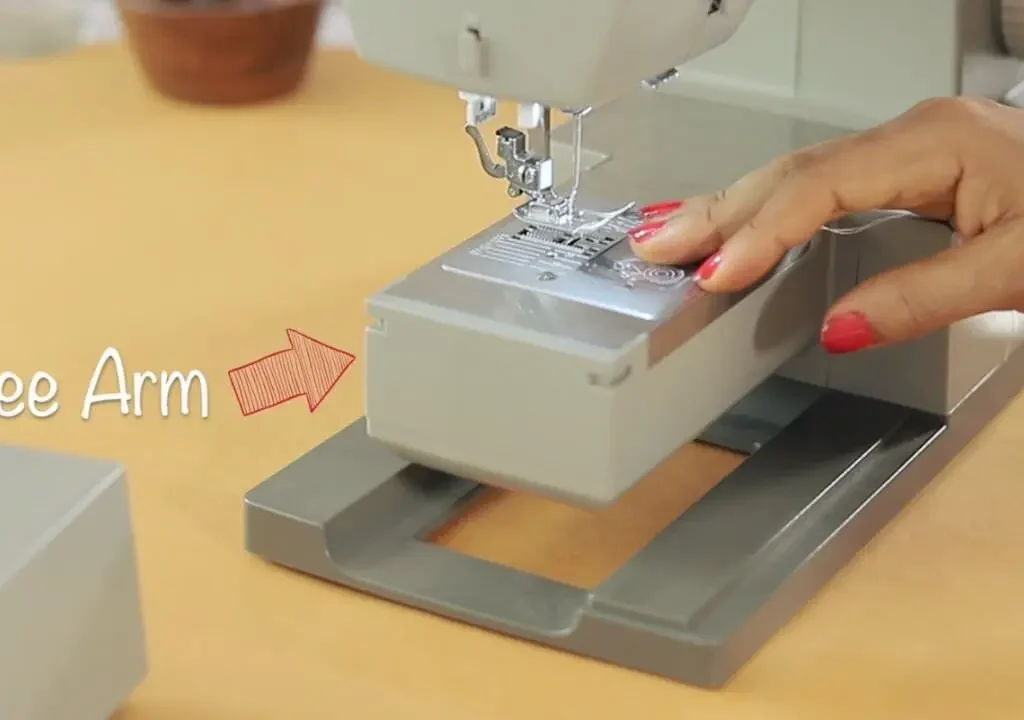
17. Free Arm
A removable section under the needle allows for circular stitching.
- Function: Makes it easier to sew cuffs, sleeves, and pant legs.
- Bonus Storage: Often doubles as a storage compartment.
18. Light Source
Built-in lamp or LED that illuminates the sewing area.
- Function: Enhances visibility for fine work.
- Upgrade Tip: Install an external LED strip if it’s too dim.
19. Power Switch
Turns your sewing machine on or off.
- Function: Powers all electronic components, including light and motor.
- Safety Tip: Always switch off before threading or changing feet.
20. Thread Cutter
A small blade on the side or back of the machine.
- Function: Allows quick thread snipping without scissors.
- May Be Manual or Auto: Some machines cut thread after locking stitch.
21. Tension Discs
Internal mechanisms near the tension dial control thread tightness.
- Function: Work with the dial to create proper thread tension.
- Maintenance Tip: Keep them lint-free for best performance.
22. Needle Clamp Screw
Holds the needle securely in place.
- Function: Let’s you change needles without tools in most cases.
- Tip: Double-check tightness before each session.
23. Presser Foot Lever
Raises and lowers the presser foot.
- Function: Controls when fabric is held or released.
- Position Awareness: Lifting the foot releases upper thread tension.
24. Drop Feed Lever
Raise/lower feed dogs for specialized sewing.
- Function: Enables free-motion work like quilting or darning.
- Caution: Don’t leave feed dogs down for normal sewing!
25. Buttonhole Lever or Sensor
Triggers the machine’s automatic or guided buttonhole process.
- Function: Measures and sews perfect buttonholes.
- Only Used: During buttonhole stitching.
🧵 Bonus Tips for Getting to Know Your Sewing Machine
Click each tip to reveal detailed guidance
Conclusion & Next Steps
Understanding the parts to a sewing machine makes you a more confident, capable sewist. From managing thread tension to choosing the right stitch, knowledge of each part empowers you to sew smarter and solve issues faster.
✅ Key Takeaways:
- Every part—from spool pin to feed dogs—has a clear function.
- Learn the components of sewing machine anatomy to boost your skills.
- Mastery of your machine starts with learning its parts.
📌 Next Step: Bookmark this guide, and check out our detailed tutorials on threading, tension adjustments, and sewing machine maintenance.
👉 Explore more on StitchingElite.com for in-depth sewing machine reviews, tips, and comparisons!